These days, we can generally get a variety of fruits and vegetables year-round due to long distance shipping and air freight. But buying produce out of season never quite tastes as good, and there is growing environmental concern over the energy used to get that food to us in the dead of winter. For all of these reasons, I try to use fruits and vegetables IN SEASON. Canned and frozen fruits can be a good substitute, especially since they are often picked at peak season before they go into a can or a freezer.
Which fruits are good canned or frozen, and which ones should we just wait to have them fresh? Are there special steps to take before baking with frozen or canned fruits that is different from using fresh? Here is a guide to baking with canned or frozen fruits:
Blueberries - Blueberries are available frozen all year round. They are also available canned, but often the canned ones come in a sweetened syrup. For pies, muffins, breads, and pancakes, I recommend using frozen berries. Spread them out on a paper towel and let them thaw, then use in the recipe as if they were fresh. If popping them into breads and muffins, you often don't even have to thaw them - follow your particular recipe. Canned blueberries (if you can find them in just water) should be rinsed and spread on paper towels to dry before using. I do not like how mushy the canned ones are, so I would only recommend them for items where the filling is all going to mush together like a jam anyway (blueberry bars, etc.) I do not use canned berries for any baked item where I want to see the individual berries (i.e. muffins).
Strawberries - Strawberries are available frozen. They get mushy after they've been frozen, so use them in things where they can be made into a syrup or a jam-like layer in bars and coffee cakes. The other great use for strawberries is to cut or mash them, macerate them in sugar, then puree them. Use this puree in strawberry cakes, cupcakes or buttercreams: Strawberry Butter Cake
Raspberries - Raspberries are widely available frozen. Since they tend to be mushy after freezing, you won't be able to use them as a lovely garnish on cakes, but you can still make them into a filling for bars, cakes, pastries, or to be mixed into frostings. For frosting and cake filling, I actually prefer to use a jar of good-quality seedless raspberry JAM instead. Make sure to get SEEDLESS.
Cherries - Sour cherries (the ones that give cherry pie its signature tartness) are rarely available in my area, even during their brief season. And since I have not found sour cherries frozen in my area, I am always forced to use canned. OreGon brand water-packed tart cherries make a good pie, just drain them and then make the filling according to your recipe. Dark Sweet cherries are widely available frozen, and these are great for baking as well. They are sweet, not tart like sour cherries. You don't always have to thaw them before using, but follow the specific instructions according to the recipe. (For example, if you are making a pie, they will thaw during the macerating phase, so you don't need to pre-thaw them.)
Squash/Pumpkin - You can cook your own and freeze it for later use, but to be honest, I love using canned pumpkin and canned squash. (NOT pumpkin pie filling in a can, but just plain cooked pumpkin or squash). Although it is not difficult to cook them yourself (and it does add a layer of flavor, especially if you roast the squash), canned has several benefits: First, you can always have a can on hand, just sitting in your cupboard, ready any time to make breads, cakes, muffins and pies. Second, it cuts down a lot on your prep time. Cooking pumpkin/squash may not be difficult, but it takes time. It usually adds a good hour on to your prep time. I do cook some pumpkin each year when the sugar pumpkins are in season, but on the whole this is one time when the difference in flavor is not dramatic enough for me to feel guilty about using canned most of the time.
Bananas - You may find bananas frozen, or you can freeze ripe ones yourself.I love to keep some frozen bananas on hand because it is hard to get ripe ones at the store. To freeze them, just peel the bananas and wrap in air-tight bags or a double layer of plastic wrap. Bananas do turn brown, but for Banana bread, muffins or cake this is fine. When you are ready to bake, just thaw and mash the bananas and use according to your recipe. Generally, three small bananas is about 1 cup when mashed.
Lemons / Limes - You can generally find lemons and limes year-round in your grocery store. But if not, a good substitute can be a jar of good-quality Lemon Curd (available in the jam aisle) for making tarts or filled pastries. If your recipe just calls for the juice, bottled lemon and key lime juice is available (usually in the juice or drink-mix aisle).
Apple Butter / Apple Jam - I am lucky enough to have a couple of family members who like to make jams and apple butters. This year I made a delicious apple butter cake with a jar of homemade apple butter. Apples are widely available raw year-round, but you may find the quality and selection is not good off-season. So using Apple Butter, Apple Jam, or Homemade Apple Sauce may be a better choice druing the winter, depending on what you are baking.
Friday, February 22, 2013
Thursday, February 21, 2013
Banana Muffins

These muffins are based on my mother's old Banana Bread recipe, with a couple of very minor alterations. (I have to say that because my mother will point it out when she reads this).
2 Cups Flour
1 teaspoon salt
1 teaspoon baking soda
1/2 cup Butter
3/4 cup Sugar
1/4 cup Sour Milk* or Buttermilk
2 Eggs
1 teaspoon vanilla
2 large or 3 small Bananas, mashed (you want to end up with about 1 Cup mashed banana)
Optional: 1/2 Cup nuts (walnuts work well for this)
Preheat oven to 350 degrees and line the muffin tins with cupcake papers (or spray with non-stick spray)
Sift together the flour, salt and baking soda in a bowl. Set aside.
Cream the butter and sugar together in a mixing bowl until fluffy. Add the eggs and mix in. Add the buttermilk (or sour milk) and vanilla. Add the mashed bananas last (and nuts if using), stirring them in by hand until well-mixed.
Drop into the muffin cups (I use an ice-cream scoop) filling each cup only about halfway.
Bake for 20-24 minutes, until the tops spring back when gently poked with a finger.
*Sour Milk - Sour milk is often found in old recipes and can be used in place of buttermilk. To make sour milk, use 1 tablespoon of white vinegar for each cup of sour milk needed. Just pour the vinegar into a measuring cup, add the milk, then stir and let sit five minutes. It will sour and slightly thicken the milk. For this recipe I used slightly less than 1 teaspoon of vinegar to make the 1/4 cup sour milk required.
Baker's Calendar
I love any excuse to bake, so I have what I fondly call my "Baker's Calendar." This list reminds me of the various holidays, change of seasons, and events coming up. If you're like me, you can use these events as an excuse to try out new recipes and dig up old favorites. Obviously any old weekday can also be a baking day, but these allow you to bake with a THEME in mind! :)
My baking calendar goes like this:
New Year's
Valentine's Day
Mardi Gras
St. Patrick's Day
Maple Tapping Season
Easter/Start of Spring
Cinco de Mayo
Mother's Day
Start of Summer
Father's Day
Fourth of July
Kids' birthdays (mine happen to be summer babies)
End of Summer
Back to School
Autumn / Apple and Pumpkin season
Halloween
Thanksgiving
Gingerbread House Season
Christmas / Hanukkah
Tuesday, February 12, 2013
Easy Valentine's Day Treats
If you are looking for sweets for your sweetie, but you don't want to get into complicated decorating, here are some treats that look lovely and are pretty easy to make (links or instructions are below each picture):


Nutella Hearts: This one is so simple it doesn't need its own recipe.
Take your favorite sugar cookie dough, roll it out and cut into hearts.
Bake as directed and spread Nutella over one heart, then top with another heart.
Take your favorite sugar cookie dough, roll it out and cut into hearts.
Bake as directed and spread Nutella over one heart, then top with another heart.

Jam Hearts: Same as above, just use good quality seedless jam instead of Nutella.
I like to cut a little "Window" out of half of the hearts (the ones that will go on top)
so the jam shows through like a Linzer cookie. Then dust with powdered sugar.
I like to cut a little "Window" out of half of the hearts (the ones that will go on top)
so the jam shows through like a Linzer cookie. Then dust with powdered sugar.

"Pink Lady" Cupcakes: Using the Strawberry Butter Cake recipe,
make into cupcakes and frost with Whipped Strawberry Buttercream
Red and White Swirl Cupcakes: Make your favorite cupcake recipe and white frosting (I used Whipped Butter Rum Frosting for this - it is tasty and sophisticated).
Get a pastry bag and paint 3-4 stripes of red food coloring inside the bag (from the tip outward). Then fill the pastry bag with the white frosting and choose any decorator tip you like. Pipe the frosting onto the cupcakes and it will come out with both red and white swirls. Top with store-bought heart candies.


Thursday, February 7, 2013
Valentine Heart Cookies
There are so many different things you can do with heart cookies for Valentine's day.
Whether you are looking for a very basic cookie or more complex decorations,
here are some ideas for heart cookies:

My favorite thing to do is make some Sarcastic Valentines:
This is actually a Chocolate Rolled Cookie recipe. To do this design, roll out colored fondant and cut it with a heart shaped cookie cutter. Apply it by brushing a thin layer of Karo syrup onto the cookie and gently press the fondant on, then write the words with a food marker or by hand-painting them on with dark pink food gel.
An easy idea is to make these Nutella sandwich hearts. Use your favorite Rolled Sugar Cookie recipe (a good one I like to use is Cake Central's No Fail Sugar Cookies recipe) and cut into hearts. When cooled, spread a small amount of Nutella on one cookie and cover it with another cookie. Done.

These hearts are decorated with Red and White Royal Icing. Royal Icing gives you a lovely smooth finish and dries hard so cookies are stackable. However, you definitely sacrifice some taste for looks here - Royal Icing is not the most tasty icing around.
These jam hearts are delicious and look like a pretty linzer cookie. Just roll out dough and cut it into heart shapes, using a smaller cutter to make "windows" in half of the cookies. When they are cooled, spread a little bit of your favorite jam on a cookie (I like a seedless Raspberry jam for this) and then cover with the top cookie (the one with the window in it). When you have done all the cookies, dust them with powdered sugar.

These hearts are made using the recipe for Chocolate Rolled Cookies
Then they are decorated using a Glace Icing which tastes better than royal icing and dries smooth with a nice sheen to it. The downside is that this icing usually takes a FULL day to dry, so plan ahead if you want to use it.
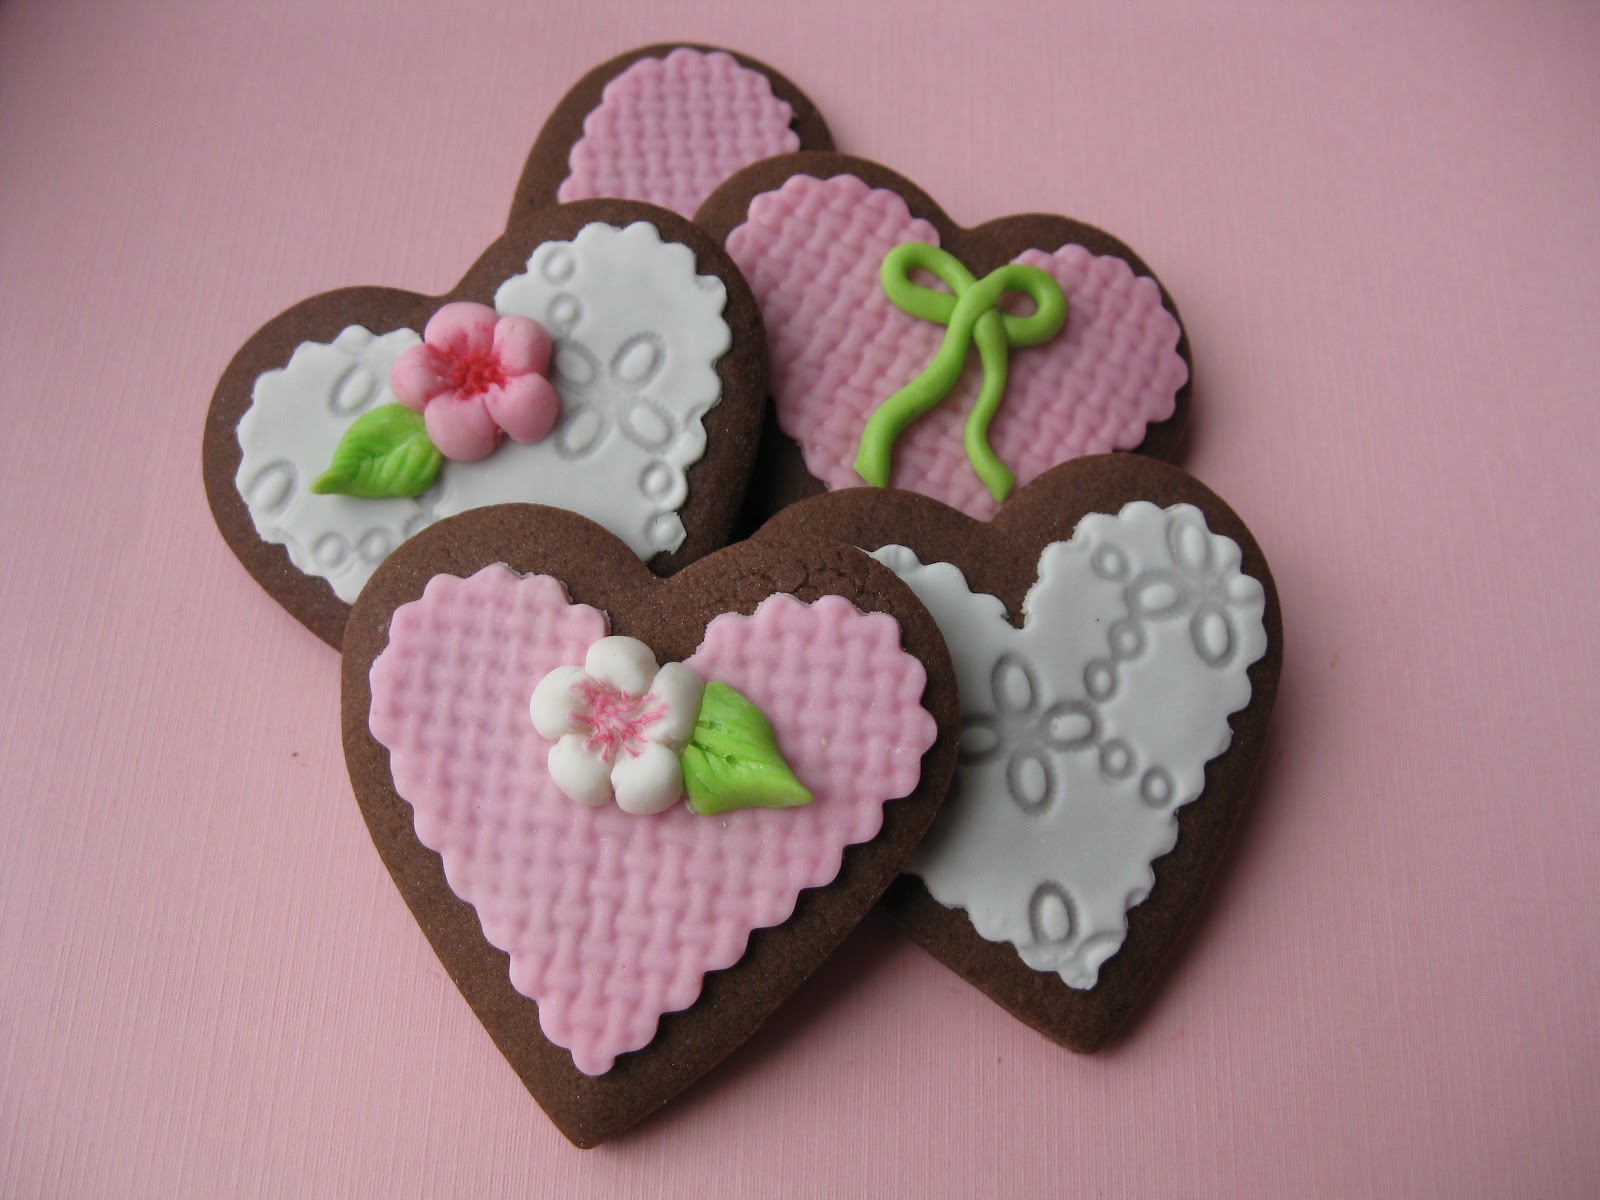
These chocolate hearts are decorated with fondant. You can buy embossing sheets with various patterns on them at your local cake decorating store or online. After rolling out the fondant, imprint it with the embossing sheet (follow instructions on the package, but with most embossing sheets you dust the sheet with cornstarch and then just press the plastic sheet onto the fondant, pressing it in with your hand or a rolling pin). Then cut out hearts from the patterned fondant with a heart cookie cutter that is slightly smaller than your cookie. Apply by brushing on a thin layer of Karo syrup onto the cookie and then smoothing the fondant piece on. The flowers above are also made from fondant put into a flower mold.
Monday, February 4, 2013
Host a Kid-friendly Mardi Gras Party!
Although I've visited New Orleans a few times, it was never during Mardi Gras. However, I loved the food and the music so much, that I wanted an excuse to enjoy it here in New England, far far away from NOLA. So I thought, why not use this fabulous "holiday" as a great party theme? Since I am a mom, I decided to do a Kid-friendly version of a Mardi Gras Party. Kids have a blast with this theme - they get to try new foods, hear fun new kinds of music, and make masks. Here are some ideas if you'd like to host your own Kiddie Mardi Gras Party:

1) Buy cardboard masks at your local craft store, along with glitter and feathers for the kids to decorate their own masks. This gives them something fun to wear and a cool keepsake to take home.

2) Serve New Orleans foods: Make a pot of Jambalaya ahead of time and then put it in a crock pot to stay warm. Kids may not like Jambalaya, so for them you could serve popcorn chicken bites and call them "Alligator bites." One thing kids will be sure to love is the sweet stuff: King Cake and Pralines can be made the day before, and Beignets can be made during (or right before) the party. For drinks, I serve Cafe au Lait made with Chicory Coffee for the adults and mock Mint Juleps for the kids (made with iced tea and mint). Here are some great recipes to get you started:


Mock Mint Juleps: Make a pitcher of unsweetened iced tea. Then, in another empty pitcher or a large bowl, place 1/3 cup sugar and a handful of mint sprigs. "Muddle" the mint and sugar together to release the mint flavor a bit. Pour the iced tea over the sugar/mint mixture, then stir. Add more sugar if you'd like, then store it in the fridge. The mint flavor will strengthen as it sits. Garnish each glass with a little sprig of mint when you serve it.
Next, it's time for a PARADE:

Choose some great Mardi Gras Music: We put some Zydeco or Preservation Hall Jazz Band on the stereo and have a "parade" through the house. The adults can give out beads or Moon Pies as the kids go by. It's kind of silly, but the kids have so much fun!
Then, dance dance dance!


1) Buy cardboard masks at your local craft store, along with glitter and feathers for the kids to decorate their own masks. This gives them something fun to wear and a cool keepsake to take home.

2) Serve New Orleans foods: Make a pot of Jambalaya ahead of time and then put it in a crock pot to stay warm. Kids may not like Jambalaya, so for them you could serve popcorn chicken bites and call them "Alligator bites." One thing kids will be sure to love is the sweet stuff: King Cake and Pralines can be made the day before, and Beignets can be made during (or right before) the party. For drinks, I serve Cafe au Lait made with Chicory Coffee for the adults and mock Mint Juleps for the kids (made with iced tea and mint). Here are some great recipes to get you started:


I also love Pecan Pralines and they are surprisingly easy to make. Here is a great recipe I use:
Paula Deen's Pecan Pralines
Paula Deen's Pecan Pralines
For Jambalaya and other authentic Deep South recipes, a great source is Deep South Dish
For New Orleans-style Cafe au Lait (Coffee with Chicory) I order from Cafe du Monde. You can also get beignet mix from them if you do not want to make them from scratch. Some specialty stores in your area may actually carry these products so you don't need to order online and pay shipping.Mock Mint Juleps: Make a pitcher of unsweetened iced tea. Then, in another empty pitcher or a large bowl, place 1/3 cup sugar and a handful of mint sprigs. "Muddle" the mint and sugar together to release the mint flavor a bit. Pour the iced tea over the sugar/mint mixture, then stir. Add more sugar if you'd like, then store it in the fridge. The mint flavor will strengthen as it sits. Garnish each glass with a little sprig of mint when you serve it.
Next, it's time for a PARADE:

Choose some great Mardi Gras Music: We put some Zydeco or Preservation Hall Jazz Band on the stereo and have a "parade" through the house. The adults can give out beads or Moon Pies as the kids go by. It's kind of silly, but the kids have so much fun!
Then, dance dance dance!

How to Make a King Cake
.JPG)
King Cake is actually not a cake at all. The only way to describe it for those who haven't had one is that it is kind of like a giant cinnamon roll shaped in a ring and covered with icing and sugars in the mardi gras colors - purple, green and gold. It is the food most associated with Mardi Gras. There is a wonderful history behind the King Cake, which is summarized nicely by Nola.com here: Brief history of the King Cake
Traditionally there is a little baby hidden within the cake. The person who gets the baby has to buy the next cake or some say, host next year's party. Getting the baby is also supposed to be lucky. If you want to put a baby in your cake, you can buy little plastic or ceramic ones at most party stores or online. (Ceramic can be baked in, plastic ones should be inserted through the bottom of the cake after it is baked).
This King Cake Recipe supposedly comes from the famous Bakery Haydel's in New Orleans, which is known for being one of the top King Cake bakeries. I cannot swear that it is in fact Haydel's recipe, but it is good!
Dough:
1/3 cup granulated sugar
1 tsp salt
½ cup all purpose shortening
4 cups all purpose flour
2 lg. eggs
1 cup milk (room temperature)
2 sm. packs active dry yeast
¼ tsp lemon flavor
¼ tsp orange flavor
¼ tsp vanilla flavor
¼ tsp butter flavor
½ cup canola oil
½ cup cinnamon sugar
In a mixer at first speed combine 1/3 cup granulated sugar, salt, and shortening until well creamed:

Add eggs and continue to cream. In a separate bowl, dissolve the yeast in the milk and add the flavors. Once dissolved add to creamed mixture and continue to mix. Switch to your dough hook attachment and add flour and mix until dough tightens:

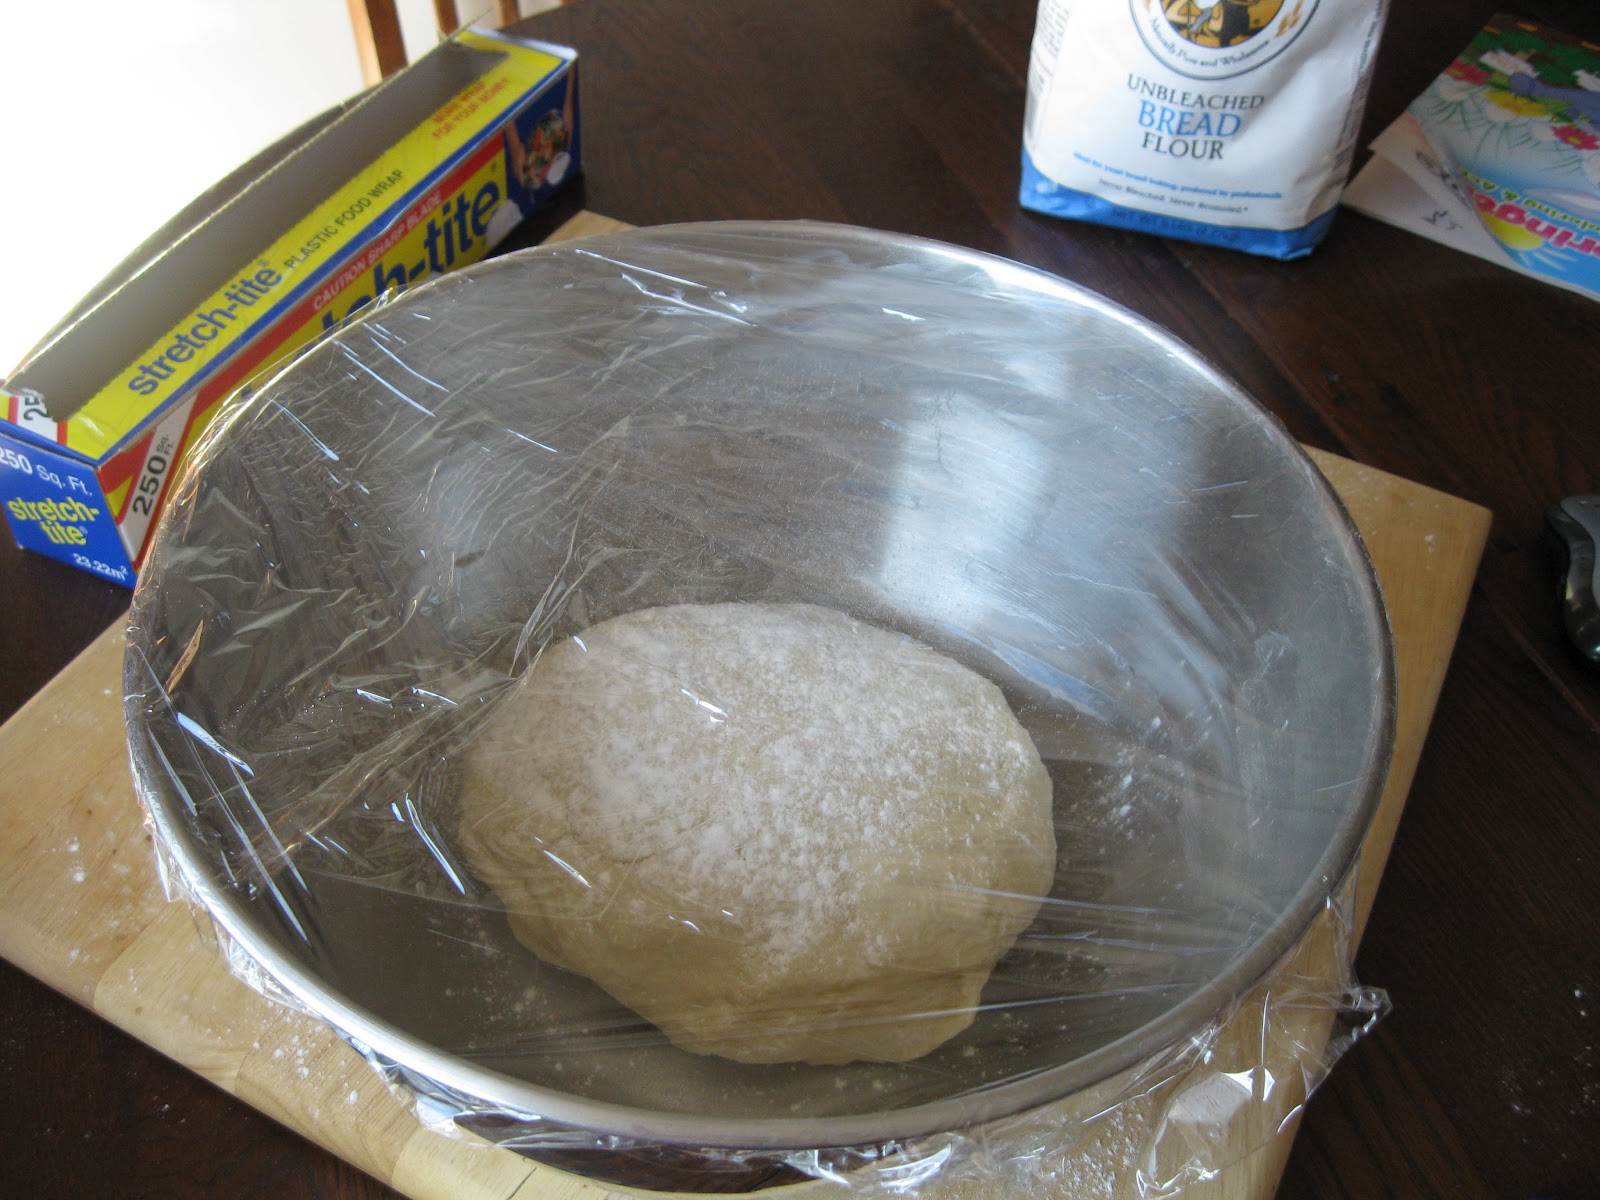
Remove from mixer and kneed into a ball. Place the ball in a lightly greased bowl and cover with a clean kitchen towel or plastic wrap. Allow the dough to rest in a warm place for 1½ hours.
(While the dough is resting you can mix your colored sugars if you are making them instead of using pre-colored sugars - See below for directions).
When dough has rested roll out into an oblong piece. Brush on canola oil covering the entire piece:

Sprinkle the cinnamon sugar liberally over the whole piece.

Once the dough is covered with the cinnamon sugar and oil, fold it in half lengthwise:

Cut into 3 strips and braid the dough.

Gently roll the dough, (kind of smooshing it into itself) by starting at one end and working all the way down to the other end:

This long piece can then be shaped into a ring like this:

Once shaped place on a baking pan covered with piece of parchment.

Place in a warm area covered with a clean kitchen towel. Allow the dough to rest again until it doubles in size.
You can sprinkle the sugars directly onto the dough before baking, or you can bake it first and then top with the icing and sugars. Make sure to alternate the three colors.
Bake at 370 degrees F for 12-15 minutes until dough is golden brown.
Laissez les bon temps rouler!
How to Make your own Colored Sugar:
3 cups granulated sugar
1 tsp purple food color (try 2 drops red to one drop blue and adjust as needed)
1 tsp yellow food color
1 tsp green food color
Note: liquid colors work best for this, not professional paste colors.
Start by taking one cup of sugar and your yellow food coloring.
Mix by hand with a wire wisk in a metal bowl until the sugar turns yellow.
Pour you yellow sugar into a separate bowl and put off to the side.
Repeat this process mixing green then purple. (By doing them in that order you only dirty one mixingbowl)
Friday, February 1, 2013
Moist White Cake
.JPG)
Delicate white cake is one of the most popular cakes, but it can be hard to find a recipe that is both light and moist. Sour cream keeps this white cake moist, while beating the egg whites and then gently folding them into the batter keeps the texture light and delicate. This recipe is so versatile - you can use the standard Vanilla extract, or vary the flavor by using other extracts like Almond or Anise (see notes below). This white cake would work well as the base for a Lady Baltimore Cake.
3 1/2 Cups Sifted Cake Flour
4 teaspoons Baking Powder
1 teaspoon Salt
2 Cups Sugar
1 Cup Unsalted Butter (at room temperature)
1/2 Cup Milk
1/2 Cup Sour Cream
2 teaspoons Vanilla extract*
7 Egg Whites
Preheat oven to 350 degrees. Line two 9" round pans with parchment paper, or use paper cupcake liners to make cupcakes. (This recipe makes 34-36 cupcakes)
Put all dry ingredients (Flour, Baking Powder, Salt and Sugar) together in the bowl of an electric mixer. Turn the mixer on low and mix the dry ingredients until they are well blended (If using a KitchenAid mixer, use the paddle attachment).
Add the butter into the flour mixture in small chunks, along with the milk. (It is very important that your butter is soft at room temperature or it will not get incorporated with the flour properly). Mix on low until moistened and then turn the mixer up to medium. Beat for 60 seconds to aerate.
Add the sour cream and vanilla into the batter, mixing for only about 20 seconds to blend it in.
In a separate bowl, beat the egg whites until they form stiff peaks (Don't beat them until they are dry, though - you want the egg whites to be thick and stiff but still moist and glossy-looking).
Gently fold the egg whites into the batter, using large slow strokes by hand. You will see streaks of egg white in the batter, that's okay, you don't want to overmix it.
Pour into pans and smooth the batter with the spoon to spread it evenly in the pan. OR if making cupcakes, use a standard ice-cream scoop to measure and dispense the batter into the cups. I find that one level scoop is the right size for a perfect cupcake, each cup no more than half full.
Bake 18-20 minutes for cupcakes
25-30 minutes for three small layers (6" or 8")
30-35 minutes for two medium layers (9" or 10")
40-45 minutes for one large layer (12")
***Bake just until the cakes spring back to the touch or until a toothpick inserted comes out clean. This cake will not brown a lot, only slightly at the edges. So don't wait for it to brown or it may be overdone.
*If using other flavored extracts, follow this chart:
Almond extract = 1 teaspoon
Anise Extract = 1/2 teaspoon
Rum Extract = 1 teaspoon
Lemon or Orange Extract = 1 teaspoon (also add 1 Tablespoon zest if possible)
Subscribe to:
Posts (Atom)